Thursday, April 29, 2010

DESIGN INSPIRATIONS

It seems we are all so busy that we find ourselves rushing madly through each day. One of the many unexpected, yet positive, aspects of doing my blog has been the development of an acute awareness of the little things. I find myself taking the time to stop and appreciate my surroundings and more often than not, I'm rewarded.

While waiting for an appointment in our beautifully restored old court house, I spotted this graceful brass and iron railing. The design could easily translate to applique, beading, or be used as a quilting motif!

Of course once I got home and downloaded these photos....I couldn't believe the crack in the marble floor on this view. However, when I was admiring the floor, I was struck by the excellent condition these old tiles were in....this crack was an exception! Never-the-less.......I loved how the border outlined the larger squares.....it's just what we do for our quilts.

Imagine the craftsmen creating these sections.......think about the skill it must have taken to achieve a perfectly balanced cornerstone design.

I'll be keeping my eyes open for new designs and tidbits to share as I head to South Carolina tomorrow to visit the Threads of Time Quilt Guild in the Lexington area. On Saturday I'll be presenting a lecture "Let It Shine" and a beading workshop. If anyone is nearby and wishes to attend....email me and I'll get you the details.

Wednesday, April 28, 2010

MORE ANTIQUE QUILTS

Here's the final look at some of the intriguing vintage quilt tops/blocks I've been blogging about. It makes me wonder just how many more bins/boxes/closet shelves/chests and stored treasures made by mountain quilters in days long gone by are yet to be discovered.

This log cabin top was machine pieced..... looks like circa 1930's to me.

How nice to see this variation of the log cabin block....featuring rectangles in the center, rather than the single square.


Look at the care the quiltmaker took when she pieced the fabric for this patch!

Here's another top featuring fan blocks and alternating solid squares.

There was a stack of fan blocks as well....made me wonder why they weren't used in the quilt top above....perhaps the quilter planned the plain blocks to feature hand quilting. Of course I couldn't resist playing a little bit with setting arrangements.....obviously I didn't work too hard since two pink patches are placed side by side.

More blocks.....again these are machine pieced which was kinda a surprise.....

And another......it's always a treat to explore and appreciate the work of quilters who've come before us.

Tuesday, April 27, 2010

LOOKING INTO THE PAST

Within the bins of vintage textiles that had me spellbound for an afternoon.....there were quilt tops to examine.....

This 4 patch was hand pieced and presumably made from usable sections of old clothing.


There were several crazy patch quilt tops made of cottons, silks, velvets, and probably some synthetics as well. The hand embroidery was colorful and modest.

I'm guessing these pieces were originally men's ties.


This one patch top was not finished......it consisted of 50 blocks. Again, I'm guessing here, but perhaps it was a school child's project.


I couldn't get an accurate color representation for this photo, however, the quilt top was milk chocolate brown and lemon yellow. Surprisingly, it was machine pieced.

Notice how carefully the quiltmaker pieced her fabric to create her patches.

It was such a special treat to handle these textile treasures from a local mountain family.......please remember dear readers.......document your work with your name, date, and location!

Monday, April 26, 2010

STEPPING BACK IN TIME

Through friends of friends, I was lucky enough to get a peek back in time by looking through 2 large containers of vintage textiles. I believe the storage conditions have damaged some of the items slightly, but overall, the colors remain bright and there is no sign of moth damage.

The embroidering was done on what I suspect was a piece of linen. Whoever stitched it was quite accomplished.


Look at this piece....still in its hoop with the needle threaded. It was probably a kit since the designs were printed on the fabric. Amazingly, the needle was rust free....so this must have been stored in a fairly damp free environment.


Detail

Some of the floss was wrapped around cardboard pieces.....this one was originally a postcard dated Feb. 20, 1937.


This feed sack looked brand new......and because it was quite small, I wonder whether it was used for advertising.

About half of one bin held laces..... Most had some brown 'aging' spots but otherwise in pristine condition. Many were tatted.....not being an expert on lace......I will offer my humble opinion to say these looked like excellent quality. If anyone knows a resource for my friends to sell them, I'd love to pass a contact along to the owners.

Detail

I've got quilts to share tomorrow from the bins.....

Sunday, April 25, 2010

CREATING BEYOND THE NORM

The March Fiber Junkie meeting provided so much inspiration.....I'll may still be blogging about it for another couple of days..... These gals are amazing..... Carol Sloan shared the following:

The bottom photo is a closeup of tree bark.....the top is a drawing Carol made using that image.


THEN......on the left is her rendition of the design which was made using her needle punch machine with fibers, yarns, and other snippets. She wasn't sure just how she'll use it yet.......but with her imagination, it will become even more awesome.

Here's a detail

The fiber make up of this piece would have been a mystery if she hadn't explained it. Carol fused a paperbacked, heavy duty fusible to a plain fabric base. Next, she peeled off the paper and painted the adhesive surface with Lumiere, which is a metallic textile paint. I love the 'cracked' texture which happened as she machine stitched the black motifs.


This final piece is another example of how Carol creates her own textured fabrics which she incorporates into other projects. Here she machine needle punched rusted cheese cloth, and a sparkly sheer onto a heavy muslin base. I can't wait to see what she does with this.....

Saturday, April 24, 2010

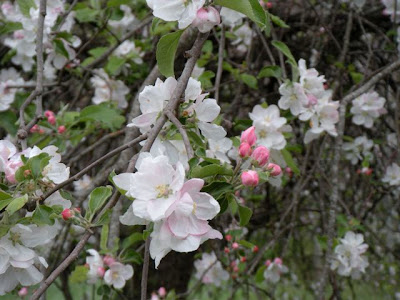
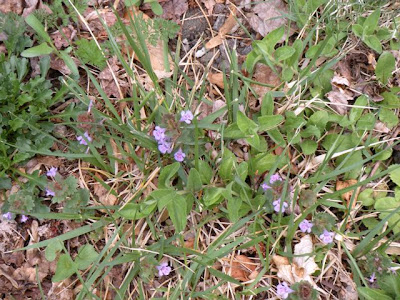
SPRING IS FINALLY HERE!!!

It seems everyone experienced a long harsh winter.......which makes us appreciate Mother Nature's renewal that much more......


Friday, April 23, 2010

HAND DYED FABRICS

Nancy Bruce, a member of Fiber Junkies is an expert at fabric dying. In fact, I think she'd dye just about anything that stands still.

What makes her so great is her willingness and passion to experiment on vast varieties of fiber contents and different types of dyes. I wish I could recall exactly what fabrics these were....but she haunts off beat fabric outlets and thrift stores....there isn't a white or off white fabric she won't purchase.


I think this was a blouse she took apart....... I'm very partial to blue and had to restrain myself from snatching this out of her hand.


This orange/rust/brown piece came from some, less than attractive, yucky tan colored 100% wool felt I gave her. I've already got it on my design wall and pondering how best to showcase her work with some beading.

Judy Simmons is another member of our group who has been consumed with the once in a life-time task of making her daughter's wedding gown. She glows when she talks about it and has posted many tutorials on her website that are fascinating to follow.

She's been saving every scrap of all the various fabrics used in its making.....from muslins to silk to $$ lace and gave them to Nancy to play with. We collectively gasped when Nancy spread these treasures out for us to look at. And...typical of every member of this generous group, she 'returned' several pieces to Judy so she can make a memento from them.


Thursday, April 22, 2010

STAMP CARVING FOLLOW UP

After our stamp carving lesson last month by Fiber Junkie's member Carol Sloan.....several in our group continued to experiment and brought new ideas when we met earlier this week.

Patsy found some fun foam at a craft store with a sticky backing......

From it she cut her own stencil and adhered it to a scrap piece of Plexiglas. Then her clever husband added a wood knob (not shown here) to make it easier to handle while stamping. She actually cut the foam, however a burning tool (seen above) could be used.....as it was below....


..........to add more interest to this commercial paisley stamp. As purchased, the stamp had a clean cut outer edge, Nancy used a burning tool to add scallops instead..... Did I tell you how clever these gals are??

She carved other stamps as well......look at the detail she managed to achieve....

Here's another great idea from Nancy.....carve a small square block....then using that same block, carve the edges. Here she cut simple diagonal lines. The size will match up perfectly to stamp a 'frame or border' around the center design.

I can barely contain myself with the overload of inspiration and information from our gathering on Tues. and am determined to practice the machine stitching methods Patsy shared. Thankfully, everyone can learn Patsy's techniques from her excellent DVD's.

Next month Nancy is going to continue our stamp theme by teaching us how to make our own embossed paper designs.

It all begins with a water soluble heavy weight stabilizer to make our 'paper pulp'.....sadly, we will all have to wait until early June to learn how it's done.