Monday, June 30, 2014

ORGANIZING FABRIC

The stash of my hand-dyed fabric experiments has been stored in one ever-growing jumbled pile.  It required a ridiculous amount of time to preview and locate a piece of interest to work with! 
 Fiber Junkie member Denny has such innovative methods to store her studio materials (I blogged about it here).  I adapted her idea of organizing smaller pieces of special fabrics by purchasing an over the door shoe rack.

Though....imagine my surprise when it was delivered in this small box....gulp...I definitely do not excel at assembling items!
 Actually, it was fairly straight forward.....3 plastic sections snapped together making one side and rods were then fitted into the provided holes.
 My helper "Sooty", our black lab rescue dog, watches in amazement as the second side was snapped into place.
 Next it was placed on the inside of my studio closet door. The bars closest to the door are fixed, the others are not.  It would have been better if I could have found a product where the bars were closer together.  The interesting thing is that the rods have a coating that is somewhat rough.  This positive feature helps to assure the fabric doesn't slip off (especially the really small pieces)  BUT, it does make it a little more difficult to remove them as well.
 Not visible in the photo are all piles of stuff stored on the floor...which had to be reorganized and pared down in order to now get the door closed.  Viewing the mess on the shelves....you get the picture anyway!
I under estimated just how much fabric required storing.....so not all the fabric fit. I found it was too difficult to see what was hung in the back when I placed anything but quite small pieces on the outer bar. However, having better access to these fabrics will be beneficial and it was worth the $20 investment.

How do you store your small speciality fabric pieces? 

Friday, June 27, 2014

WAVELENGTH - NEW WOOL WORK

Speaking of gifts I've received from quilt buddies.....

 My talented pal Nanette Zeller gave me several embossed clay focal items, made by one of her pals.
 I've had them sitting on my 'urgent' I wanna do something with them pile....
In a fit of trying to get my hand dyed wool pieces better organized, I uncovered this lovely, subtle, ice-dyed small piece of wool.  I've never attached an item shaped like this before....which was challenging I must admit.
The edges were not uniform, some slopping in toward the bottom, others side were opposite. It was a good exercise in proper spacing and thread tension!
 Before I went further with the embellishing, I began to explore other design elements.   
After hauling out what seemed to be half the supplies in my studio....this hand dyed piece of gauze caught my eye.
 So as is often the case....I changed my mind.  The circle motifs were replaced with embroidered squiggles and beads, with a plan to use some gauze.  WELL.....it took me hours to realize I couldn't get small gauze pieces attached to the wool without the shine of fusible web or glue.  Hand stitching didn't hold it well enough.

So.....since not a single other thread in my entire collection was the correct shade.....I pulled these long threads from the gauze...

 .......and hand stitched the small motifs instead.  It was the long way around to achieve these little touches but it worked.  
Detail of the bead embellished clay motif.


 Though I work in many different styles, I'm especially drawn to simple, clean, minimal designs.....featuring a focal element which is quite visible. It draws the viewer in for a closer look where other details keep their interest.
WAVELENGTH   -     10" W  X  8" H
Artist ice-dyed wool, machine stitched, hand 
embroidered, and bead embellished.
  Museum wrapped on wood frame.

Check out what other artists have been up to this week at these links:  Nina-Maries's Off the Wall Friday,   Sarah's Whoop, Whoop Friday, and at Crazy Mom's.

Thursday, June 26, 2014

SEA GLASS

My years of travel in the quilt world have taken me to places I'd never dreamed of visiting.  They've led to experiences that could never be duplicated and   memories that will last forever.

The really big bonus is the friends I've connected with along the way. Whether it's face to face or new Internet pals.....friendship is the true bonus of my  career.
A surprise gift of embellishment material from Jo Timko arrived recently.  Thank you, thank you Jo!!

She shared some sea glass she's collected, along with a fossil from their farm and an enchanting shell.

Sea glass is something I've read about....but never saw, much less touched.  Here's the Wikipedia definition:

 "Sea glass" is physically and chemically weathered glass found on beaches along bodies of salt water. These weathering processes produce natural frosted glass. "Genuine sea glass" can be collected as a hobby and can be used to make jewelry. "Beach glass" comes from fresh water and in most cases has a different ph balance, and has a less frosted appearance than Sea glass."
Included in the package was a string of textured beads and sparkly embroidery thread.  Believe me when I say....my mind is whirling with possibilities and gratitude.

GOOD LUCK TODAY TO TEAM USA AS THEY PLAY THEIR SOCCER MATCH TO ADVANCE IN THE WORLD CUP.

Wednesday, June 25, 2014

DYED WOOL RESOURCE

Who says you can't find the right color when working with wool??  Weeks Dye Works has it all......  They over-dye a variety of fibers....this is not felted wool, rather it's over-dyed wool in the most fantastic colors you've ever seen.  
 Solids
 Floss (2-6 strand) and Perle cotton  (I can't get enough of these!!)
Wool prints
 A variety of weaves
 More choices
Stunning colors.....  I'm anxious to begin creating right now!!

Tuesday, June 24, 2014

EARLY MORNING IN THE MOUNTAINS

We walk for excerise...honestly, I can't say it's for pleasure.  However, it's an opportunity to appreciate Mother Nature...when I remember to LOOK!!!

Monday, June 23, 2014

FIBER JUNKIES SHOW AND TELL

Every quilter loves show and tell...our group of 6 is no exception....
 Here's Kate sharing a beautiful piece of cotton that was ice dyed.
 ....and another....
 She and Denny had an ice-dye day in South Carolina where they live....it's much warmer there than here in the mountains, so they got some pretty fast and fabulous results. 

 Aren't these just wonderful??
 Val has been busy working with paper....she's equally skilled in both paper and fiber....which she correctly reminded us.....paper IS fiber!

She made stunning books using her own stamped, screen printed, and stenciled papers.  Adding a wash over some of the images added to the complexity and interest.
This lovely one featured overlays of laces and a ribbon binding......

Next month we all promised to bring our deconstructed fabrics to ogle over!!!

Sunday, June 22, 2014

UNVEILING MY WASHED DECONSTRUCTED PRINTING RESULTS

 Do you find it's like Christmas morning when examining fabrics after all the dye has washed out?? My plan was to wait and share the results when my buddies bring theirs next month to show and tell...BUT...I'm pumped and can't wait.

My original idea this time was to work in blues.  My screens are on the fairly small size, resulting in small pieces that never seem to be quite enough to complete a project.  AND...they never seem to go with each other either as I jump from one color choice to another like a kid in a candy store.
Well....I decided to use some pale yellow silk noil...as I love the texture that fabric brings to my work.  This was bright blue dye, but turned a pale teal on my fabric.  Not what I expected....but of course if I'd had thought about the fact I wasn't using WHITE.....hummmmm.
 Here I used silk noil that printed badly. I rescreened it using a color that is now forgotten.......it was shade of blue, but apparently it didn't want to remain blue either.
 Silk noil....the big blob in the upper right corner was where plastic stuck to the screen as it was drying....sigh.  The first screening never releases much dye....add the bumpy texture of silk noil =  this piece was practically naked, with only a small amount of blue that printed.  So, I went back over it with a foam brush with some orange dye.....it looks more gold here, but it's ORANGE.  It will take some thinking to figure out how to use it.
 Silk noil - 2nd printing....but again I had to add another color to make it interesting.
Same here.....though I didn't get the blues I was looking for...I'm never-the- less happy with my prints.  It will challenge me to take another path....
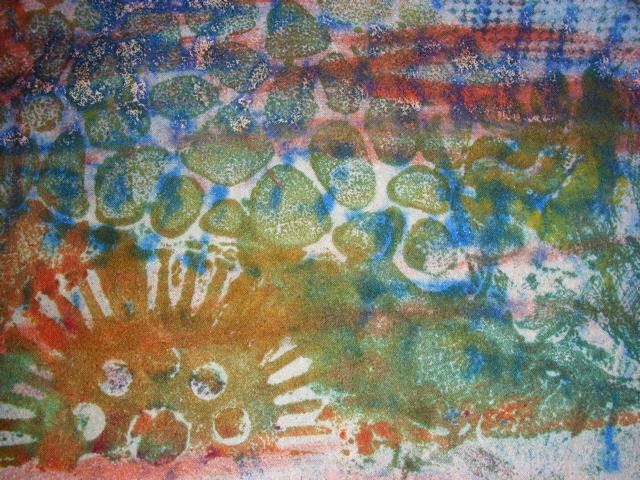
 This was a piece of cotton that was placed on the resist material (after printing onto the screen) Denny suggested using up the extra dye by reverse stamping (I guess that's what you might call it.)  Isn't this surprising how much dye remained??
 Kate brought a new color for us....can't recall the exact name but it was a light gray.  Greens and grays were never in my palette box....but DIL loves them....and I find myself drawn to their beauty now myself.  

Unfortunately, it printed very light....too lightly so I went back over it with a thinned down Loden green.....
And finally, I found this bit of gauze in the bottom of a wash out bucket when I was changing the water.....it belonged to Judy....but happily, now it's mine.  Thank you Judy....

We already have our date to meet next month and are finalizing what technique we will explore......do come back and visit again....but I hope you won't wait till the middle of July to stop by!

Saturday, June 21, 2014

FIBER JUNKIES - CONTINUED

Here's a peek at some of our deconstructed screen printing. It's always so interesting to view before and then later after photos.  (after they are washed).
I'll share them after our next meeting when they are unveiled.
 Denny's work is in the foreground....she truly is fearless!  We are so thrilled she agreed to join our group!  Here, instead of following the normal routine of printing through a silk screen.....she began to add squiggles directly onto her fabric....and then printing....we loved the results.
 Gen used both deconstructed screen printing and stenciling on this piece.
 There were many favorites....I coveted this landscape looking piece of Denny's. 
 Judy printed on organza....I'm especially anxious to see what they look like after washing.
 This is Val's.....another favorite of mine.  Val works so quietly......but we all want to be at a table next to her so we can copy whatever she does....what an eye she has!!
Upper work is Kate's....lower is more of adventurous Denny's printing.....

More to come.......

Friday, June 20, 2014

FIBER JUNKIES JUNE MEETING

One of my most favorite days of the month.....Fiber Junkie day.....
 We met at Val's, who so often gets stuck hostessing us for summer meetings since she has such a great space for dyeing.  Here Kate (left) Val (right) are gearing up for our deconstructed screen printing day in Val's garage.
 Val's asphalt driveway is spaceous and sunny....where our screens are drying (background) and all our resists are within easy reach (foreground)
 We tried a new color.....a pale grey.....it had a catchy name but it's gone from my mind already.
 As is typical with deconstructed screen printing....the first print (top) doesn't release much color....but look at the second....Love it!!  I used a blank CD, bubble warp, a flat metal disc, and some sequin waste.
 Our newest member Denny continually amazes us with so many helpful tips.  We are asking her document all of them in a book for us as a Christmas gift.....it's never too soon to start that project Denny!   

Often after preparing the screen for printing....excess dye remains on the resist material.  Denny suggested that instead of washing off the dye, that we take a piece of soda ashed fabric.....press it onto the materials to transfer and use up the dye.  Look what I got!  The foreground resist is a plastic sink protector, in the back you may notice the design of a piece of orange construction netting.
 Once the fabric is printed...it's rolled up in black plastic and placed in the sun to  'batch' for a few hours.  To be on the safe side, I will wait 24 hrs. before washing out the excess dye.  

Because it was a really warm day, we all tried to remember to wash our screens immediately after printing and put in the sun to dry.
 Gen came without an apron....and of course it didn't take long for dye to transfer to her t-shirt.  So......it didn't take us long to decorate her.  (As Judy placed one of two hand prints on her chest!)

Another TIP from Denny.....wear a plain white t-shirt that had been treated with soda ash.  Wipe your hands on it at will.....like a clean up cloth.  She wore one that was so attractive....you'd never believe it wasn't purposely dyed.
Being the dignified gal that I am....okay, stop laughing.....I put my orange hand print on her back!

Visit again....there's more to share....

Also....do stop in at these links where you can see what other artist have been creating this week.  Nina-Maries Off The Wall Friday, Crazy Mom Quilts, Sarah's Whoop, Whoop Friday.